This is a sponsored conversation written by me on behalf of JOANN. The opinions and text are all mine.
I’m a huge fan of personalizing store bought gifts, especially these darling Easter gifts, with my Cricut machines. I love to craft, but I don’t always have the time to make everything from scratch. Sometimes I have to make dinner and take the kids to a bazillion sports practices. So I’ll swing by my favorite stores and pick up fun goodies like these darling Easter treat bags, plush bunnies and fabric lines baskets that I can easily personalize with the new Wisteria Cricut Explore Air 2 and Wisteria Cricut EasyPress, available only at JOANN!

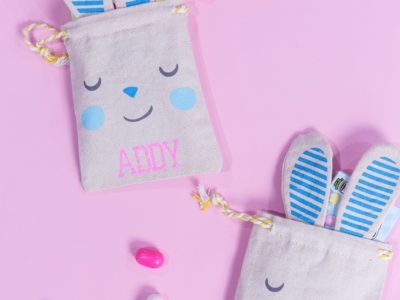
To personalize these bags, which I picked up for only a dollar each and plan to give to all my sweet little nieces and nephews, you’ll need just a few supplies from JOANN.
Supplies to Personalize Easter Gifts
- Cricut Wisteria Explore Air 2 Bundle
- Cricut Wisteria EasyPress
- Pink Glitter Iron-On (and maybe green for boys!)
- Straight Edge Cutter
- Scissors
- Ruler
- Ironing Mat
- Fabric Easter Gift Bags
- Design Space
How To Personalize An Easter Gift Tutorial
- Design – open Cricut Design Space and choose a monogram or a favorite font to create each child’s name.
- Size – measure the Easter gift and size the name or monogram to fit in the space.
- Attach – attach each group in Design Space so that the letters will stay together when you send them to cut.
- Mirror & Cut – send your design to the canvas, mirror image all iron-on projects, and cut (making sure to place the shiny side of the material down).
- Weed – weed out all the excess material, making sure to get the small areas in loop letters.
- Apply & Iron – iron-on backer is tacky and makes it perfect for placing on fabrics so that it doesn’t move while you press.
- EasyPress – using the guide, select the material temperature and duration and set on the machine. Warm the fabric with a few swipes of the EasyPress. Then place over design, set the timer and wait. Press the front, flip and press the back, flip and test the corners. If pulling away, repeat the process.
 I think they turned out so darling and I’m sure my nieces are going to love them so.


You can use this same process to personalize darling Easter bunny tummies like this, and

fabric lined Easter bunny baskets like these!

More Cricut Iron-On Tutorials
I’m loving everything iron-on. Here are a few graphic tees I’ve whipped up with my Cricut:
- Feed Me And Tell Me I’m Pretty Graphic Tee
- Shine Bright Graphic Tee
- Proud To Be An American Graphic Tee
- Easter Egg Hunt Graphic Tee
- Sew Awesome Graphic Tee
Remember, the Wisteria Cricut Explore Air 2 and the Wisteria EasyPress, which work really well with the color of the year don’t you think, are only available at JOANN! Don’t wait to grab yours!! As always, I hope you’re inspired to craft, bake, create and celebrate!
INSTAGRAM | FACEBOOK | PINTEREST | GOOGLE+ | TWITTER | YOUTUBE | BLOGLOVIN
Thank you for supporting my wonderful sponsors. They make it possible for me to keep the ideas coming! All content, ideas, photography and opinions are that of my own and I’d have it no other way! There may be affiliate links in this post, of which we do earn a small fee at no cost to you.
 You Get What You Work Hard For – Free Girl Boss Prints