best ever OREO ice cream recipe
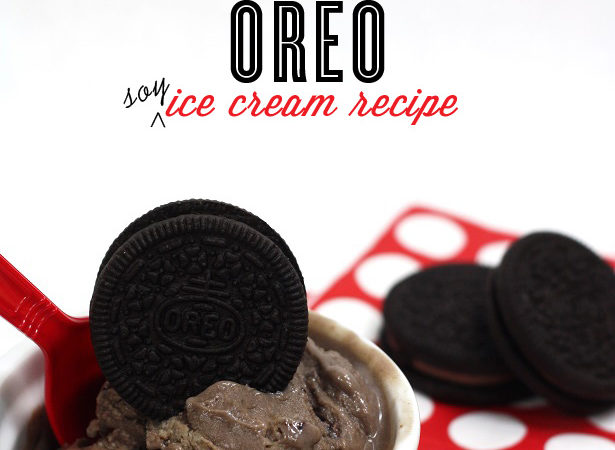
Ice cream recipes… vanilla, chocolate, strawberry, blueberry… have been on my mind for the past few weeks. My youngest has severe food allergies and at the top of that list is dairy… which can make summer treats very hard. When all the other kiddos are running to the ice cream truck and picking anything they want off …