Star Wars Ewok Halloween Pet Costume
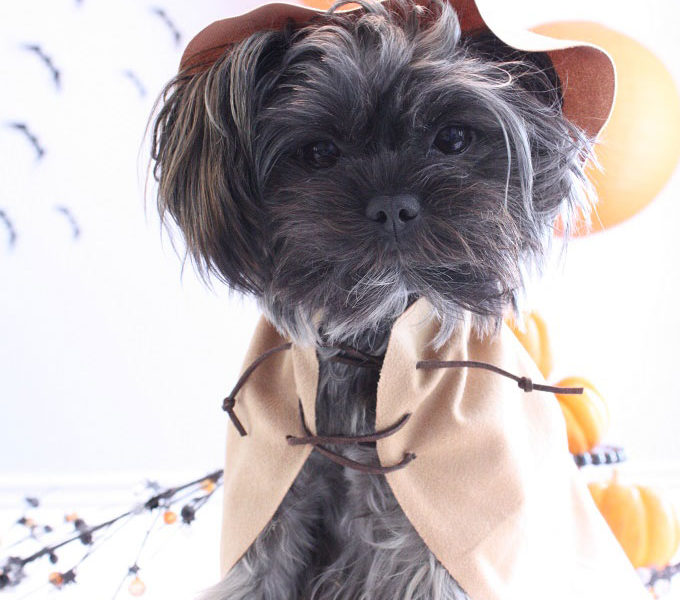
Let’s make a Star Wars Ewok Halloween costume for your pet! Okay, when you have a puppy (actually an adult Shorkie) like my little Boo Boo, you don’t have to work very hard on this pet costume, but I can’t get over the cuteness! It would work great on any furry friend. Are you a …